
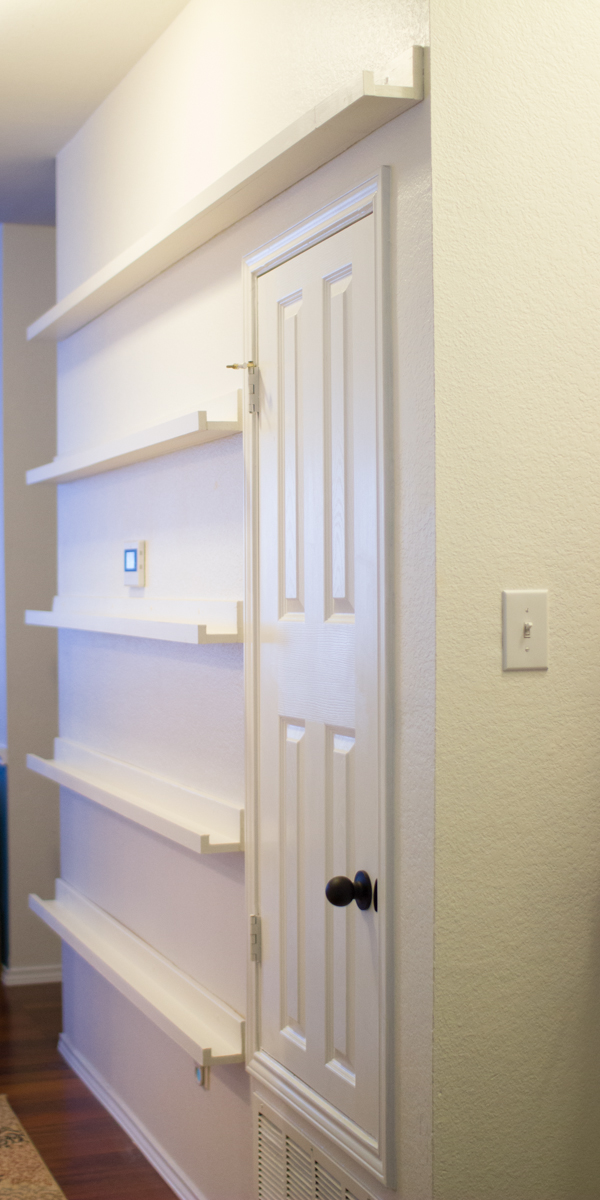
I had seen something on Pinterest that caught my eye and I really loved, so I decided it needed to be in my home. I was originally going to do the really small wall that the kitchen bar is attached to, but one afternoon while discussing my plans with Mom I was complaining about the wall that the thermostat and air conditioner door were on and she said "Why not do the ledges on that wall instead?" Duh. It would be the perfect way to camouflage the thermostat, which is not centered on the wall and is situated too high to hang anything above it.
 My ledges are very basic and follow a very simple design: 1x4 for the back piece, 1x3 for the bottom piece, and 1x2 for the front piece. I uses wood glue as well as screws and finishing nails. Wood glue! Normally I would have just screwed everything together and called it a day, but not today - today I used wood glue because those clever stockers at Home Depot had it right next to the wood I was buying. Impulse buy. "Hey, I think I'll be all professional and use wood glue." $3.47 later and I have a huge bottle of barely noticeably used wood glue.
So the boards make sort of a U shape when all put together. I pre-drilled my holes (I know! It's like I'm a pro now or something.) and screwed the 1x3 to the 1x4 to form an L. Then I flipped that over, applied some more wood glue, and used small finishing nails to attach the 1x2 to the front to make a lip that will keep the frames from sliding off.
I put one coat of paint on the ledges before screwing them to the wall. I decided to paint them the same color as the wall so they sort of blend in. That way the frames will really show and the wall won't seem terribly cluttered. I used my nifty little stud finder to mark all my studs, and then I grabbed my shelves and pre-drilled more holes before realizing I didn't have the right screws for mounting them to the wall. I fixed that with a quick trip to Elkins Hardware, and then got back to work.
I should've taken the time to properly counter-sink my screws. I know this. After all, I used wood glue and pre-drilled my holes today. But I was being a little lazy with this step. I sort of did a counter-sick like thing and so some of the screws went in further than others. But I puttied over all of them anyway and you know what? The shelves are going to be covered with picture frames - you won't be able to see the screws! So there.


No comments:
Post a Comment